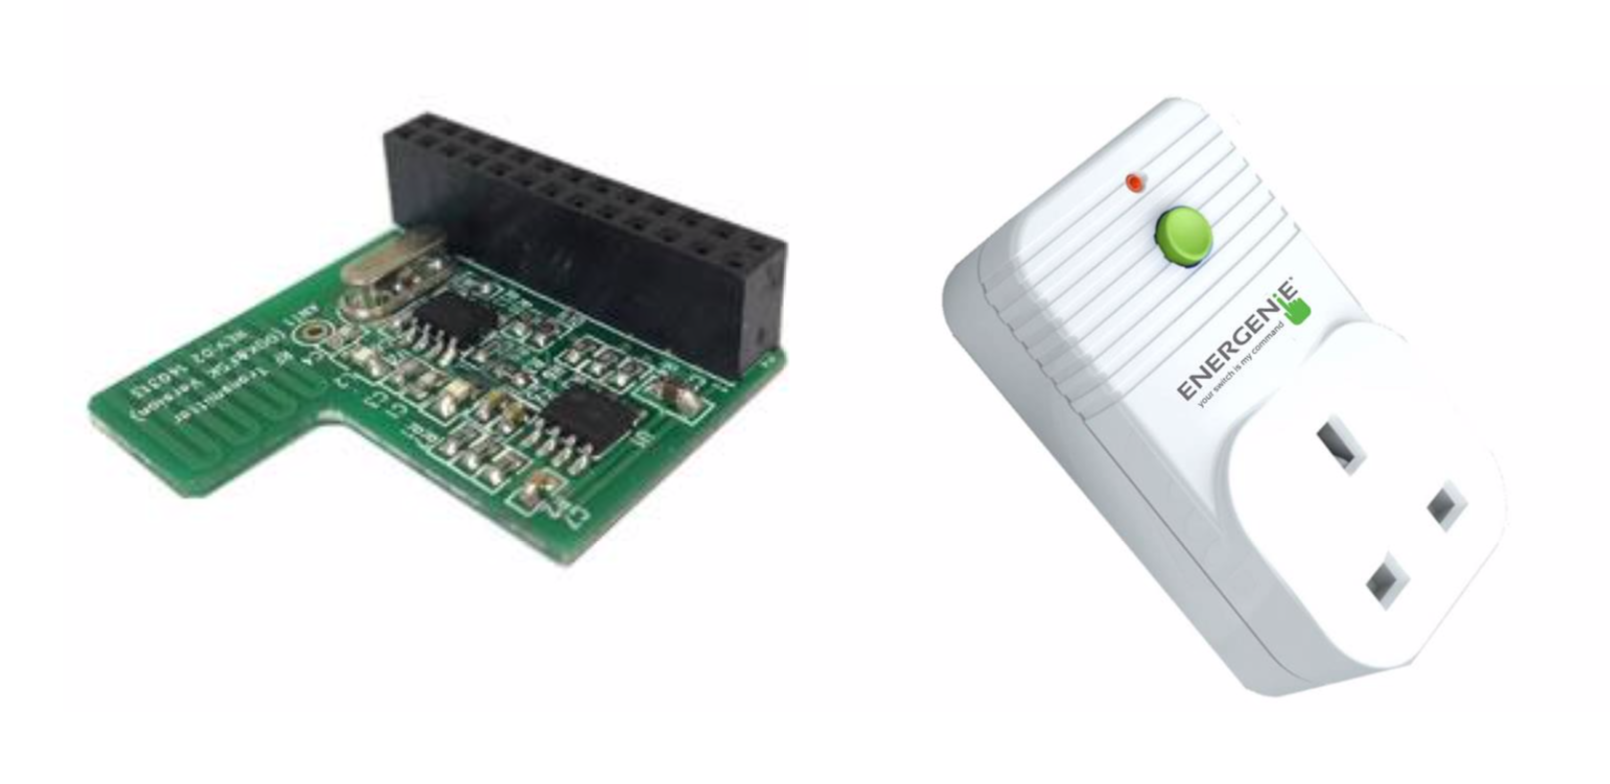
Several years ago I purchased a set of Energenie remote controlled sockets that I used to be able to switch on my living room lamps from my sofa. Since I moved, I haven't put them to much use as they're not as convenient y my current house.
However, a neighbour had a break-in this summer and that made me think I could try and find out the way to program these to switch on and off lights or other devices while we're away so I can give the impression that the house is not empty and avoid a posible burglar threat.
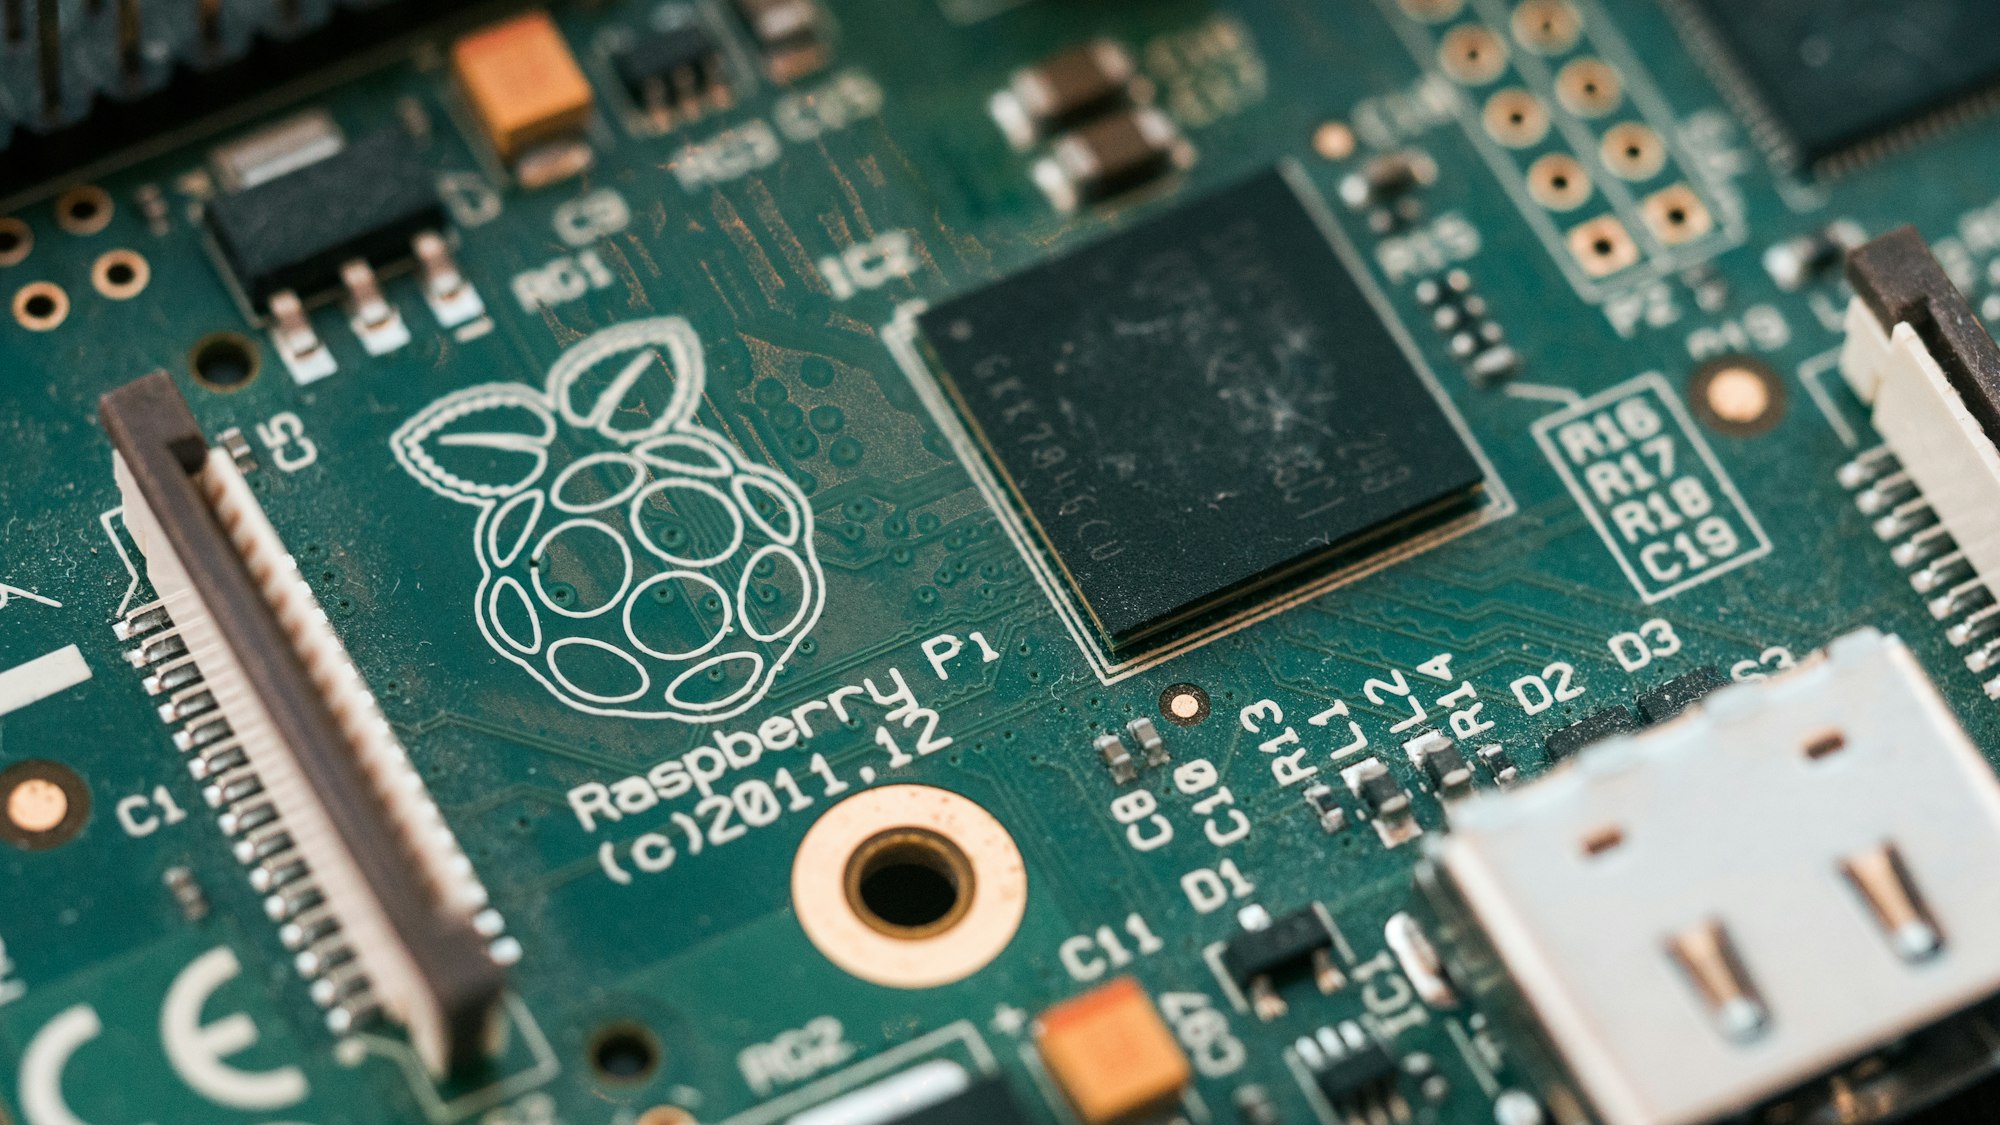
The same company developed a control board for Raspberry Pi (PiMote) so I thought I could use that and develop a piece of software to program them while we're away. Maybe even to action them remotely from our mobile phone or computer.
This article will cover the first step, ie, set up the Raspberry Pi as a with PiMote to pair with and action the sockets and develop a simple web application to operate the sockets from there.
Set up the Raspberry Pi
The first steps to set up the Raspberry Pi are easy to reproduce, a quick google search should be enough if you encounter any trouble:
- Download the latest Raspberry Pi OS and burn the SD card using Raspberry Pi Imager. The Lite version is enough as we do not need any graphic interface for this project.
- Plug the PiMote board to the Raspberry Pi, the power source and wait until it boots.
- Config WiFi settings or plug the Ethernet cable.
- Activate SSH to be able to connect to your RPi remotely.
Once all this is ready, we can ssh into our RPi from our computer.
Use PiMote to operate the Energenie sockets
The oficial PiMote Manual is a very good guide to learn how to operate the Energenie sockets from our RPi. I used its example to develop the python scripts for this projects. First, let's ssh into our RPi:
$ ssh 192.168.0.31First, we need to pair the sockets to PiMote, for which I developed this script, heavily based on the official manual. First, create a new file:
$ sudo nano energenie_pair.pyPaste the script code and save.
Plug one of the sockets and press the switch until the LED light starts blinking. Then execute the script like this:
$ python energenie_pair.py 1Press enter when asked and the led light of your Socket should turn off. Then, you will have paired the Socket "1" to your RPi+PiMote device. It is convenient to label your socket in order not to forget which one is which.
As you can see on this script, pairing and switching the sockets is done through a control code which is different depending on the socket and the action. In order to simplify things, there is a Python library available to deal with the RPi.GPIO details. First we install the python library:
$ sudo apt-get install python-pip
$ sudo pip install energenie
Then, the switch script is pretty easy:
#!/usr/bin/env python

# Import modules
import energenie as e
import time
import sys

# Get command line arguments
socketID=int(sys.argv[1])
action=sys.argv[2]

if(socketID > 4 or socketID < 1 or (action != 'on' and action != 'off')):
  exit("Invalid arguments")

if(sys.argv[2] == 'on'):
  e.switch_on(socketID)
elif(sys.argv[2] == 'off'):
e.switch_off(socketID)Using this script, we can just switch on or off our energenie socket just by typing:
$ python energenie_switch 1 on

$ python energenie_switch 1 off
These command will switch on and off the Energenie socket paired as 1.
With this and cron, it should be enough to program lights to be switched on and off at certain times. However, this is not all we want. We want to be able to easily switch the sockets from a nice web interface and ultimately even being able to schedule programs. The next step will cover the creation of a PHP web interface and set-up of an Apache server on our RPi that will serve our GUI.
The software
Even though this problem could be solved by putting together a couple of scripts. I always tend not to go the "easy" way and just do it because I know at some point it will break. Every software project, as simple as they can be, should be tackled in an organised manner. I've been a software engineer for long enough to know the benefits of a properly structured project and the use of good practice and development techniques even for the simplest projects. For this reason, I decided to use some open source tools to lean on in order to ease the development as well as help to keep the project structured.
This instructions assume that you have your own web development environment using PHP + MySQL and related tools to develop our application. Although it would be technically possible to develop directly on the Raspberry Pi, it would not be at all advisable, plus we can explain the setup of the server and deployment of the application later, giving an idea of how a real world project works.
Slim framework
For this project, the primary tool I'll be using is the Slim PHP framework, a "a PHP micro framework that helps you quickly write simple yet powerful web applications and APIs". It is a very simple framework, quick to learn and lean (you could understand its source code in a day). You can read more about this framwork on its official website.
Install framework using composer:
composer require slim/slim:"4.*"Slim requires any implementation of PSR-7 interfaces for its Request and Response objects, but also has its own ones. We need to install them separately:
composer require slim/psr7Optionally, we can use a dependency container to prepare, manage, and inject application dependencies. Slim supports containers that implement PSR-11 like PHP-DI. To install it, type:
composer require php-di/php-diOnce we have installed these, let's create a directory structure for the project:
.
├── bin/                Executable files
│   └── energenie_pair.py
│   └── energenie_switch.py
├── config/              App configuration
│   └── bootstrap.php   bootstrapping the application
├── public/             Web server files (DocumentRoot)
│   └── .htaccess       Apache redirect rules for the front controller
│   └── index.php       The application entry point
├── src/                PHP source code
├── templates/          Twig templates
├── var/                Temporary files (cache and logfiles)
├── vendor/             External package (for composer)
├── .htaccess           Internal redirect to the public/ directory
├── .env                Environment variables (DB access) and config values
├── .gitignore          Git ignore rules
└── composer.json       Project dependencies and autoloader
And add a working PSR-4 autoloader for the src/ directory.
"autoload": {
    "psr-4": {
        "App\\": "src/"
    }
}
Run composer update for the changes to take effect.
Entrypoint
Our application should have a single entry point from which the whole application should be served. We will use Apache redirections later to rewrite rules to redirect the web traffic to this single entry point to the application. First, create the application entry point in public/index.php:
<?php

(require __DIR__ . '/../config/bootstrap.php')->run();
Configuration
In order to simplify things, we will put all our settings, config and bootstrap code in a single file, which is enough due to the simplicity of this project. If this gets too complex, we can always divide it into several files to separate concerns. In the config directory, create the bootstrap.php file:
<?php

use DI\ContainerBuilder;
use Psr\Container\ContainerInterface;
use Slim\App;
use Slim\Factory\AppFactory;

$containerBuilder = new ContainerBuilder();

// Build PHP-DI Container instance
$container = $containerBuilder->build();

// Instantiate the app
AppFactory::setContainer($container);

$app = AppFactory::create();

// Add middleware
$app->addBodyParsingMiddleware();

// Register routes
$app->get('/', function (Request $request, Response $response) {
	$response->getBody()->write('Hello world!');
	return $response;
});

return $app;
With this in place, we could navigate to our home page and it should show "Hello world!".
Other dependencies
For any data that we'll need to persist, we're going to need a database. To manage the persistence service and related functionality, we will be using Doctrine ORM, the Object-Relational Mapper that is used by Symfony.
Install Doctrine ORM
composer require doctrine/ormTo use the Doctrine entity manager and provide our MySQL database credentials, we need to add the following to our bootstrap.php file:
/* ... */

$containerBuilder = new ContainerBuilder();

$containerBuilder->addDefinitions([
    // dependencies
    EntityManagerInterface::class => function (): EntityManager {
        $config = Setup::createAnnotationMetadataConfiguration([__DIR__.'/../src/Domain/'], true);
        $config->setMetadataDriverImpl(
            new AnnotationDriver(new AnnotationReader, [__DIR__.'/../src/Domain/'])
        );

        $config->setMetadataCacheImpl(
            new FilesystemCache(__DIR__.'/../var/cache/doctrine')
        );

        return EntityManager::create([
            'driver' => "pdo_mysql",
            'host' => "localhost",
            'port' => "3306",
            'dbname' => "homedomo",
            'user' => "domouser",
            'password' => "pasword$%^&*",
        ], $config);
    },

]);

// Build PHP-DI Container instance
$container = $containerBuilder->build();

/* ... */However, this would expose our DB credentials and possibly other config to the version control system. To avoid this, we can make use of dotenv in order to abstract our credentials from our code.
Install DotEnv
composer require vlucas/phpdotenvcreate .env file in our root directory with the following values:
DB_DRIVER="pdo_mysql"
DB_HOST="localhost"
DB_PORT=3306
DB_NAME="homedomo"
DB_USER="domouser"
DB_PASSWORD="pasword$%^&*"And edit the bootstrap.php to include the .env values:
<?php
/* ... */

$dotenv = Dotenv::createImmutable(__DIR__.'/../');
$dotenv->load();

/* ... */

        return EntityManager::create([
            'driver' => $_ENV['DB_DRIVER'],
            'host' => $_ENV['DB_HOST'],
            'port' => $_ENV['DB_PORT'],
            'dbname' => $_ENV['DB_NAME'],
            'user' => $_ENV['DB_USER'],
            'password' => $_ENV['DB_PASSWORD'],
        ], $config);

/* ... */
We won't commit the .env to our source code repository making thus our database credentials independent to our source code.
To run database migrations, validate class annotations and so on we will use the Doctrine CLI application that is already present at vendor/bin, but in order to work, this script needs a cli-config.phpfile at the root of the project telling it how to find the EntityManager we just set up:
<?php

use Doctrine\ORM\EntityManagerInterface;
use Doctrine\ORM\Tools\Console\ConsoleRunner;

$container = (require __DIR__ . '/config/bootstrap.php')->getContainer();

return ConsoleRunner::createHelperSet($container->get(EntityManagerInterface::class));
Lastly, we want to install Twig, a PHP flexible template engine to help us display our views:
composer require slim/twig-viewAfter adding these dependencies, our bootstrap file will look like this:
<?php

use App\Controllers\HomeController;
use App\Controllers\SwitchController;
use DI\ContainerBuilder;
use Doctrine\Common\Annotations\AnnotationReader;
use Doctrine\Common\Cache\FilesystemCache;
use Doctrine\ORM\EntityManager;
use Doctrine\ORM\EntityManagerInterface;
use Doctrine\ORM\Mapping\Driver\AnnotationDriver;
use Doctrine\ORM\Tools\Setup;
use Psr\Container\ContainerInterface;
use Slim\App;
use Slim\Factory\AppFactory;
use Slim\Views\Twig;
use Slim\Views\TwigMiddleware;
use Dotenv\Dotenv;

require_once __DIR__ . '/../vendor/autoload.php';

$dotenv = Dotenv::createImmutable(__DIR__.'/../');
$dotenv->load();

$containerBuilder = new ContainerBuilder();

$containerBuilder->addDefinitions([
    // dependencies
    EntityManagerInterface::class => function (): EntityManager {
        $config = Setup::createAnnotationMetadataConfiguration([__DIR__.'/../src/Domain/'], true);
        $config->setMetadataDriverImpl(
            new AnnotationDriver(new AnnotationReader, [__DIR__.'/../src/Domain/'])
        );

        $config->setMetadataCacheImpl(
            new FilesystemCache(__DIR__.'/../var/cache/doctrine')
        );

        return EntityManager::create([
            'driver' => $_ENV['DB_DRIVER'],
            'host' => $_ENV['DB_HOST'],
            'port' => $_ENV['DB_PORT'],
            'dbname' => $_ENV['DB_NAME'],
            'user' => $_ENV['DB_USER'],
            'password' => $_ENV['DB_PASSWORD'],
        ], $config);
    },

    // Twig templates
    Twig::class => function () {
        return Twig::create(__DIR__ . '/../templates', ['cache' => false]);
    },

]);

// Build PHP-DI Container instance
$container = $containerBuilder->build();

// Instantiate the app
AppFactory::setContainer($container);

$app = AppFactory::create();

// Add middleware
$app->addBodyParsingMiddleware();
$app->add(TwigMiddleware::createFromContainer($app, Twig::class));

// Register routes
$app->get('/', function (Request $request, Response $response) {
	$response->getBody()->write('Hello world!');
	return $response;
});

return $app;
Now we can say, we're ready to start designing our software.
The domain
The first thing we need to model are the sockets. We will use a Doctrine entity to store on DB the following information:
- Socket ID
- Name
- Description
So we create our model class under src/Domain/Socket.php
<?php

namespace App\Domain;

use Doctrine\ORM\Mapping as ORM;

/**
 * Socket
 *
 * @ORM\Table(name="homedomo.sockets")
 * @ORM\Entity
 */
class Socket
{
	/**
	 * @var integer
	 *
	 * @ORM\Column(name="id", type="integer", nullable=false)
	 * @ORM\Id
	 * @ORM\GeneratedValue(strategy="IDENTITY")
	 */
	private $id;

	/**
	 * @var string
	 *
	 * @ORM\Column(name="name", type="string", length=50, nullable=false)
	 */
	private $name;

	/**
	 * @var string
	 *
	 * @ORM\Column(name="description", type="string", length=256, nullable=false)
	 */
	private $description;

	/**
	 * Get id
	 *
	 * @return integer
	 */
	public function getId()
	{
		return $this->id;
	}

	/**
	 * Set name
	 *
	 * @param string $name
	 *
	 * @return Socket
	 */
	public function setName($name)
	{
		$this->name = $name;

		return $this;
	}

	/**
	 * Get name
	 *
	 * @return string
	 */
	public function getName()
	{
		return $this->name;
	}

	/**
	 * Set description
	 *
	 * @param string $description
	 *
	 * @return Socket
	 */
	public function setDescription($description)
	{
		$this->description = $description;

		return $this;
	}

	/**
	 * Get description
	 *
	 * @return string
	 */
	public function getDescription()
	{
		return $this->description;
	}

}To create this table on our DB, we just run php vendor/bin/doctrine orm:schema-tool:update. Alternatively we can just prepare the CREATE TABLE statement on SQL and run it using our management system (phpmyadmin, MySQL workbench, etc).
To seed the DB, we could create a migration that would input some records on our DB but the sake of simplicity, I'll just manually input the desired records on DB:
INSERT INTO sockets (`id`, `name`, `description`)
VALUES
(1, 'Living room', 'Living room mantelpiece lamp'),
(2, 'Office', 'Office desk lamp'),
(3, 'Bedroom', 'Bedroom night stand lamp');
Socket Operations (factory method)
For now, we will create three kinds of socket operations (I decided to call them 'operations' rather than 'actions' in order not to confuse them with the controller actions): 'On', 'Off' and 'Pair'. Those operations apply to any of the sockets and will execute one of the python scripts we included in the bin/ directory of our project. To model this, we can make use of an abstract class that will hold the common functionality of any operation and extend it for each of the aforementioned operations. If, in the future, we decided to add a new socket operation, we would just need to extend this class again to create the new one. Finaly we could use a class that would create the kind of operation we need depending on the case. In Software Engineering, this is called a factory method design pattern and is a nice way to show good development practices in this project.
Create the following files on src/Application/SocketOperations:
<?php

namespace App\Application\SocketOperations;

use App\Application\SocketOperations\Exceptions\SocketOperationRunFailedException;
use App\Domain\Socket;

abstract class SocketOperation
{
    protected $program = '/usr/bin/python';
    protected $scriptPath;
    protected $socket;

    public function __construct(Socket $socket, $scriptPath = '/home/pi')
    {
        $this->scriptPath = $scriptPath;
        $this->socket = $socket;
    }

    abstract public function getCommandString();

    public function run()
    {
        $output = [];
        $return = null;

        exec(escapeshellcmd($this->getCommandString()), $output, $return);

        if ($return !== 0)
        {
            throw new SocketOperationRunFailedException(implode(" ", $output));
        }

        return $output;
    }
}And then, extend this for specific operations:
<?php

namespace App\Application\SocketOperations;
use App\Domain\Socket;

class SocketPowerOn extends SocketOperation
{
    public function getCommandString()
    {
        return "{$this->program} {$this->scriptPath}/energenie_switch.py {$this->socket->getId()} on";
    }
}<?php
namespace App\Application\SocketOperations;
use App\Domain\Socket;
class SocketPowerOff extends SocketOperation
{
public function getCommandString()
{
return "{$this->program} {$this->scriptPath}/energenie_switch.py {$this->socket->getId()} off";
}
}<?php
namespace App\Application\SocketOperations;
use App\Domain\Socket;
class SocketPair extends SocketOperation
{
public function getCommandString()
{
return "{$this->program} {$this->scriptPath}/energenie_pair.py {$this->socket->getId()}";
}
}And finally, the factory:
<?php

namespace App\Application\SocketOperations;

use App\Domain\Socket;
use App\Application\SocketOperations\Exceptions\SocketOperationNotFoundException;
use App\Utility\Configuration;

class SocketOperationFactory
{
    const OPERATION_ON = 'on';
    const OPERATION_OFF = 'off';
    const OPERATION_PAIR = 'pair';

    const OPERATIONS = [
        self::OPERATION_ON,
        self::OPERATION_OFF,
        self::OPERATION_PAIR
    ];

    protected $scriptPath;

    public function __construct(Configuration $config)
    {
        $this->scriptPath = $config->get('scripts_path');
    }

    public function createSocketOperation(string $operation, Socket $socket)
    {
        if ($operation == self::OPERATION_ON)
        {
            return new SocketPowerOn($socket, $this->scriptPath);
        }
        else if ($operation == self::OPERATION_OFF)
        {
            return new SocketPowerOff($socket, $this->scriptPath);
        }
        else if ($operation == self::OPERATION_PAIR)
        {
            return new SocketPair($socket, $this->scriptPath);
        }

        throw new SocketOperationNotFoundException();
    }
}In this example, I'm injecting a Configuration object that I created to hold any config info that would need to be available at any point in the application. In this case, I'm adding the bin/scripts directory of our project so those are the scripts executed when calling a socket operation. To make this available, I added the following to our config/bootstrap.php file:
    // Configuration
    Configuration::class => new Configuration([
        // python scripts path
        'scripts_path' => __DIR__ . '/../bin/scripts'
    ])
Controllers
Now we need to develop the controllers. We only need two actions for now: rendering the home page or executing an operation. Slim allows you to create controller action in several ways, such as:
- As a closure function where the route is defined (as in the bootstrap.php example).
- As a class implementing
__invoke()method. - As a class method.
I'm going to go ahead and use the third way, as I'm sure having a controller class will be useful as the application grows. The switch action can be defined in src/Controllers/ like this:
<?php

namespace App\Controllers;

use App\Application\SocketOperations\SocketOperationFactory;
use App\Domain\Socket;
use Doctrine\ORM\EntityManagerInterface;
use Psr\Http\Message\ResponseInterface as Response;
use Psr\Http\Message\ServerRequestInterface as Request;

class SwitchController
{
    protected $em;
    protected $operationFactory;

    public function __construct(EntityManagerInterface $em, SocketOperationFactory $operationFactory) {

        $this->em = $em;
        $this->operationFactory = $operationFactory;
    }

    public function switch(Request $request, Response $response, $args){

        $data = $request->getParsedBody();
        $socket = $this->em->getRepository(Socket::class)->find($data["socket"]);
        $operation = $this->operationFactory->createSocketOperation($args['power'], $socket);

        try
        {
            $operationReturn = $operation->run();
        }
        catch (\Exception $ex)
        {
            $errorResponse = ['message' => $ex->getMessage()];
            $response->getBody()->write(json_encode($errorResponse));
            return $response
                        ->withHeader('Content-Type', 'application/json')
                        ->withStatus(400);
        }

        $returnData = ['message' => "Socket {$socket->getName()} is {$args['power']}", 'result' => implode(' ', $operationReturn)];
        $response->getBody()->write(json_encode($returnData));

        return $response
                ->withHeader('Content-Type', 'application/json');
    }
}
We need to add the routes on the bootstrap.php file like so:
<?php

use App\Controllers\HomeController;
use App\Controllers\SwitchController;

/* ... */

$app->post('/switch/{power}', SwitchController::class . ':switch');
$app->get('/', HomeController::class . ':home');
View
The last thing to do is to create the home (and only) page controller. For this, I'll be using Bootstrap, and JQuery to send the requests to the server. First we need to develop the controller:
<?php

namespace App\Controllers;

use App\Domain\Socket;
use Doctrine\ORM\EntityManagerInterface;
use Psr\Http\Message\ResponseInterface as Response;
use Psr\Http\Message\ServerRequestInterface as Request;
use Slim\Views\Twig;

class HomeController
{
    protected $em;
    protected $view;

    public function __construct(EntityManagerInterface $em, Twig $view) {
        $this->em = $em;
        $this->view = $view;
    }

    public function home(Request $request, Response $response, $args){
        $socketRepository = $this->em->getRepository(Socket::class);
        $sockets = $socketRepository->findAll();
        return $this->view->render($response, 'index.twig', ["sockets" => $sockets]);
    }
}
And finally, a view using Twig:
<!doctype html>
<html lang="en">
    <head>
        <meta charset="utf-8">
        <meta name="viewport" content="width=device-width, initial-scale=1, shrink-to-fit=no">
        <meta name="description" content="">
        <meta name="author" content="">
        <link rel="icon" href="/docs/4.0/assets/img/favicons/favicon.ico">

        <title>Cam House sockets</title>

        <!-- Bootstrap core CSS -->
        <link rel="stylesheet" href="https://stackpath.bootstrapcdn.com/bootstrap/4.5.2/css/bootstrap.min.css" integrity="sha384-JcKb8q3iqJ61gNV9KGb8thSsNjpSL0n8PARn9HuZOnIxN0hoP+VmmDGMN5t9UJ0Z" crossorigin="anonymous">
        <style>

            html,
            body {
                height: 100%;
            }

        </style>
    </head>

    <body class="text-center">
        <div class="container d-flex h-100 p-3 mx-auto flex-column">
            <header class="mb-auto">
                <h3 class="brand">House Sockets</h3>
            </header>

            <main role="main">
                <div class="alert" role="alert" style="display:none">
                </div>
                <table class="table">
                    <tbody>
                    {% for socket in sockets %}
                        <tr data-id={{ socket.id }}>
                            <td>Socket {{ socket.id }}</td><td>{{ socket.name }}</td><td>{{ socket.description }}</td><td><a class="btn btn-success btn-on">on</a> <a class="btn btn-danger btn-off">off</a></td>
                        </tr>
                    {% endfor %}
                    </tbody>
                </table>
            </main>

            <footer class="mt-auto">
            </footer>
        </div>

        <!-- JS, Popper.js, and jQuery -->
        <script src="https://code.jquery.com/jquery-3.5.1.js" integrity="sha256-QWo7LDvxbWT2tbbQ97B53yJnYU3WhH/C8ycbRAkjPDc=" crossorigin="anonymous"></script>
        <script src="https://cdn.jsdelivr.net/npm/popper.js@1.16.1/dist/umd/popper.min.js" integrity="sha384-9/reFTGAW83EW2RDu2S0VKaIzap3H66lZH81PoYlFhbGU+6BZp6G7niu735Sk7lN" crossorigin="anonymous"></script>
        <script src="https://stackpath.bootstrapcdn.com/bootstrap/4.5.2/js/bootstrap.min.js" integrity="sha384-B4gt1jrGC7Jh4AgTPSdUtOBvfO8shuf57BaghqFfPlYxofvL8/KUEfYiJOMMV+rV" crossorigin="anonymous"></script>

        <script>
        	$(document).ready(function() {

                function switchSocket(url, socket){
                    $.post(url, { "socket" : socket }, null, "json")
                    .done(function(data) {
                        $alert = $('.alert')
                        $alert.addClass('alert-success').html(data.message).fadeIn();
                        setTimeout(function(){
                            $alert.fadeOut();
                        }, 2000)
                    })
                    .fail(function(data) {
                        $alert = $('.alert')
                        $alert.addClass('alert-danger').html(data.responseJSON.message).fadeIn();
                        setTimeout(function(){
                            $alert.fadeOut();
                        }, 2000)
                    });
                }

                $(".btn-on").click(function() {
                    const socketId = $(this).closest("tr").data("id")
                    switchSocket("/switch/on", socketId)
                });

                $(".btn-off").click(function() {
                    const socketId = $(this).closest("tr").data("id")
                    switchSocket("/switch/off", socketId)
                });
            });
        </script>
    </body>
</html>
With this, our web application to control the switches can be considered finished for the scope of this article.
Set up web server
Install Apache
In order to deploy our application to our Raspberry Pi, we first need to set it up as a web server. The software par excellence that allows the machine to manage user http requests is Apache, which is at the moment the most used web server with about 60% of the web using it.
Before installing Apache it is always good practice to update our machine:
$ sudo apt-get update
$ sudo apt-get upgrade
Once the Raspberry Pi is up to date, we install the Apache server
$ sudo apt-get install apache2Once the installation is completed, we can test that Apache is working properly by going to the Raspberry Pi address on a browser, so we can open our browser and type "http://192.168.0.31". You should then get a page with a message saying "It works!" and plenty of other text.
Install PHP
We need to install the PHP interpreter in order to serve our application:
$ sudo apt install php php-mbstringTo check php is working, delete the index.html file in /var/www/html and then create an index.php file:
echo "<?php phpinfo();?>" > /var/www/html/index.phpCheck again "http://192.168.0.31" and we should see the PHP info page.
Install MySQL
$ sudo apt-get install mariadb-server php-mysqlTo check MySQL is working we will connect via the command:
$ sudo mysql --user=rootWe will now delete the default MySQL root user and create a new user, because the default one can only be used with Linux root account, and so not available for the webserver and php scripts. To do so, once we connect to MySQL, we simply run the following commands:
DROP USER 'root'@'localhost';
CREATE USER 'root'@'localhost' IDENTIFIED BY 'password';
GRANT ALL PRIVILEGES ON *.* TO 'root'@'localhost' WITH GRANT OPTION;
So we now have a web server, connected to PHP and MySQL.
Deployment
Copy files and add permissions
Due to the simplicity of this project, we will not set up any complex deployment strategy. To deploy our application we'll keep it simple this time: we will copy over our code files to our Raspberry Pi web directory /var/www/html using an FTP client like Filezilla.
The Apache user www-data will be the one reading the web app so we should set it as owner and grant apropriate permissions:
$ sudo chown -R pi:www-data /var/www/html/
$ sudo chmod -R 770 /var/www/html/
Then, we need to make sure the energenie python scripts work. We can test this with Postman. Take into account that it will be the www-data linux user who will be executing the python scripts so we need to make sure that it has the correct permissions and the scripts are executable so we need to run the following:
$ sudo chmod +x /var/www/html/bin/scripts/energenie_pair.py
$ sudo chmod +x /var/www/html/bin/scripts/energenie_switch.py
I had trouble getting this to work because the www-data needed to be added to the gpio group in order to have access to the GPIO pins of the Raspberry Pi. Having googled around, this is apparently no longer required. However, I still needed to do it:
$ sudo adduser www-data gpioRedirect traffic
Now, as we mentioned eariler, we need to redirect all the traffic to the single entry point, located in public/index.php. To do that, we create a .htaccess file in public/ with the following code:
# Redirect to single entry point
RewriteEngine On
# RewriteBase /
RewriteCond %{REQUEST_FILENAME} !-d
RewriteCond %{REQUEST_FILENAME} !-f
RewriteRule ^ index.php [QSA,L]
and add another .htaccess file on the project route directory:
RewriteEngine on
RewriteRule ^$ public/ [L]
RewriteRule (.*) public/$1 [L]
This will override any attempt to access a script directly and direct it to the public/index.php entry point.
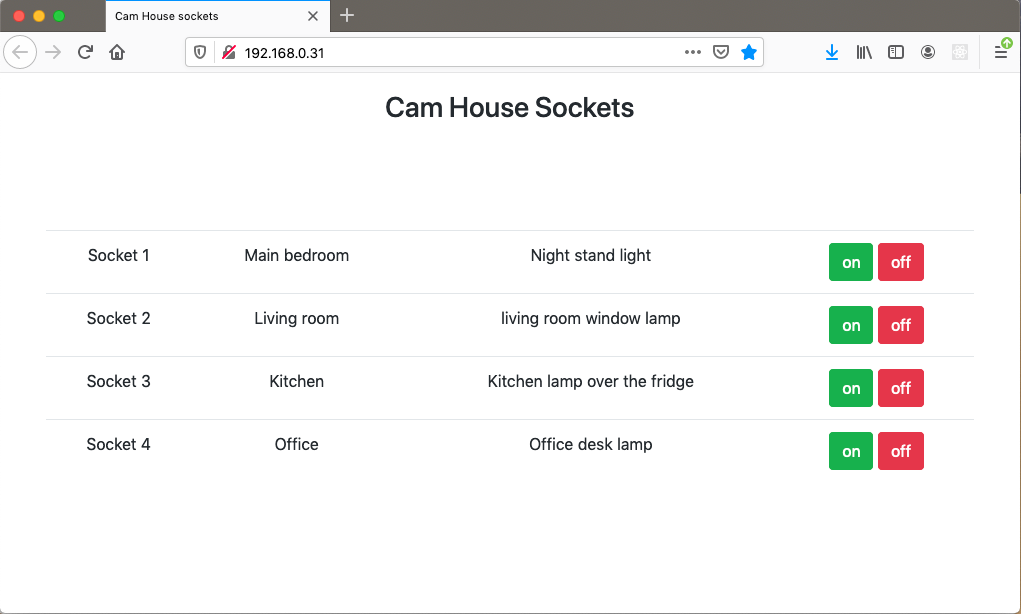
And it's ready!
The application should now be available to view and use on our Raspberry IP address, so typing http://192.168.0.31 on a browser should show our fully working application:
Conclusions and furtherwork
With this example, we have shown the whole development, set-up and deployment of a properly structured web application running on a Raspberry Pi plus the use of the PiMote board, as an application to home domotics. Our software and hardfware set-up allows us to switch our sockets on and off as long as we're connected to our house network. Further improvements to the software should allow us to program our sockets at different times of the day as it was the original intention of this article. Due to the length of this article, this will be developed in next article.
Other improvements could involve making the application available outside our network so we can edit our programs and manually switch our Energenie sockets when we are away.